The concept for this pin-free bulletin board dates back to the 18th Century; examples are seen in paintings from that time. More recently, you have seen them offered in trendy home furnishings catalogues and stores.
While the idea of using a lattice of ribbons on a board to display snap shots and other ephemera originated well before the invention of the thumbtack and pushpin, this application is timeless.
Hundreds of years ago, papers were precious and the ribbon board was one way to keep them safe. Now, although paper is plentiful, there are some paper items we cherish and want to display, preferably without poking holes through them. So, once again, "everything old is new."
While early ribbon boards were made by simply stretching ribbons across a piece of wood, today's versions are fancier to look at and easier to construct. One of the great things about this project is that it can be as feminine or as funky, as masculine or as mod, as you wish.
The first thing to decide, then, is where you will hang your ribbon board. Choose fabric and ribbon to coordinate with that room's decor. If the ribbon board is a gift, think about the recipient's hobbies or interests.
MATERIALS:
1 piece of 3/16" foam core board, 15" X 20"
1 piece of fabric, 20" X 24" for front covering
1 piece of fabric, 15" X 20" for back covering
9 feet or more ribbons
1 piece of 1/2" quilt batting, 15" X 20"
1 package brass 1" paper fasteners
Double-sided tape
TOOLS AND SUPPLIES:
Scissors
Stapler
Ruler
Hammer
Big nail
Small hole punch
Thin wire for hanging
Xacto knife
STEPS:
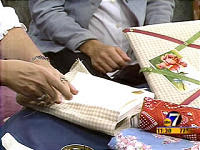
To begin, determine the size you want your memory board to be. Ours is made from one half of a standard sheet of foam core board, which leaves the other half to make another board. But perhaps you would like a tall thin one to fit that narrow space by the door. Make yours any size you wish.
Lay the larger piece of fabric wrong side up on your work surface.
Place the piece of batting in the center of the fabric. No need to measure -- just leave a border of fabric all around the batting.
Place the foam core board on top of the batting.
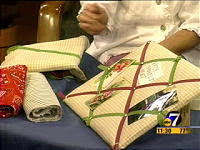
Next, attach the fabric to the back of the foam core using double sided tape. Run a strip of the tape along all 4 sides of the back of the board. Pull the fabric snug over one of the long sides, secure on tape in the center of that side. Pull fabric snug on opposite side, secure in the center of that side. Do the same on the two short sides.
To finish securing fabric to board, continue stretching and securing from the center out every couple of inches on opposite sides, taking care to make corners tidy and square.
With board still wrong side up, use a marker to mark every five inches about 1" in from the edge of board on all four sides. These marks will show you where to attach your ribbons.
To add brass buttons and further secure ribbons, place your covered foam core board right side up on a thick layer of magazines. Where 2 ribbons cross, use hammer and large nail to punch hole through ribbons, all the way through board.
Place paper fasteners through all holes, open and secure on backside.
To finish, use open stapler to attach small piece of fabric to back of board. Then stretch piece of thin wire across back of board. Poke ends through fabric on back edge about 5" down from top. Twist ends to secure. This forms the hanger.


 I love bears!! I also love woodsy type stuff.. so naturally I fell in love with this pattern by Debbie Fields. Out of all the quilts I have made this one has taken me the longest. I spent 4 months on this one. It took a while because of the detail of the applique and the satin stitching around the edges. This one was a queen size quilt...The blocks are 16 inches and sitting on-point. I did not take a picture of it finished, but you get the idea! It is quilted and being used on my log bed... I also made a table runner to match that was quilted on my table-top machine...

 Up close you can see the bear paw and the bear quilted into the runner...


